Resources
Identify good spots, use the right tools and playing in a group will be more profitable.
To identify resource sources in-game you can:
- hover over a resource in a Foundry blueprint, the text will give you info
- click in navigation on a planet and at the bottom right access the resource extractor interface, you will see the basic droppable resources on the planet
- search for your resource on the Warframe wiki, see References for more info
Boosters
Very important, stacking boosters will allow you to get much more resources in the same amount of time. The resource booster (orange) is the most important, others are not worth the plat cost unless you already have a good plat income, which will come later.
Resource booster sources (increases resources from pickups):
- companions
- in-game shop: resource booster. Costs plats, after that slot purchase is a priority buy that will allow you to accelerate your resource farm AND your plat farm (virtuous circle). 30-day boosters are the most cost-effective in cost/day.
- endless relics (survival, defense...) : accumulates up to +100% resource pickups
Resource drop chance boosters sources (increases resources drops on the ground):
- farm frames
- steel path : booster +100% drop chances
- in-game shop : booster +100% chances de drop. Applies to whole group once. (if 4 players have it, it only applies +100% on enemies drops not 400%).
- endless relics (survival, defense...) : accumulates up to +100% resource drop chances
- True Master's Font, blessing from MR 30+ player in relays (go to relay to AFK / take a break and grab some blessings)
If you have no boosters do not despair. The most important is to know they exist to give you a medium-term goal to acquire them and benefit earlier.
Resource Spots
For a synthetic list consult wiki page on recommended farm locations.
We will only see common early-game resources, for more details see wiki, resources by planet table.
The extractor interface at the bottom right indicates planet resources, in order of abundance. Each planet has a "Dark Sector" node with a different icon and an indicated drop booster.
Common

- Nano Spores
- early: Deimos (bounties, Hyf (Defense), Terrorem (Survival))
- Piscinas, Saturn
- Oestrus, Eris: tileset with 2 yellow points, a big blue hologram in the farm room
- Zabala, Eris: survival with bonus loot

- Alloy Plates
- early: Venus, everywhere
- Draco, Ceres
- Gabii, Ceres
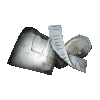
- Salvage (recovery)
- early: Mars, everywhere
- Cameria, Jupiter
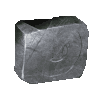
- Ferrite
- early: Tikal, Earth / Apollodorus, Mercury
- Survival / Defense, Void
Uncommon
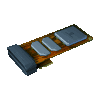
- Circuits
- early: Venus, everywhere
- Draco, Ceres
- Gabii, Ceres
- Cryotic Excavation missions
- early: Tikal, Earth
- Hexenon
- Ideal is to use resource extractors and not farm directly to save time
- Survival, Jupiter

- Plastids
- early: Deimos, everywhere
- Cambion (open-world), Deimos + Itzal
- Stephano, Uranus
- Ophelia, Uranus
- Assur, Uranus
- Polymer Bundle
- early: Venus / Mercury, everywhere / Apollodorus, Mercury
- Ophelia, Uranus
- Assur, Uranus
- Rubedo
- early: Earth, everywhere
- Survival / Defense, Void
- Zeugma, Phobos
Rare
2 ways to farm rare resources
- enemy drops: favor dense maps, Defense/Survival in Steel Path or 4 players in normal
- special crates drops:
- use AoE frame: Xaku / Limbo (spam 4 with range + energy)
- AoE weapons
- equip Animal Instinct to see crates on minimap if possible

- Argon Crystal
- Void, everywhere. Automatic minimap indicator on ally drop.
- spam fast maps by breaking crates: capture, extermination in Void (Ukko, Hepit, Oxomoco, Teshub)
- long missions: defense, survival (Taranis, Belenus, Ani, Mot)
- Void, everywhere. Automatic minimap indicator on ally drop.

- Gallium
- early: Mars, everywhere
- Ophelia, Uranus

- Morphics
- early:
- Apollodorus, Mercury
- Mars, everywhere (Wahiba, Tiane's Pass)
- early:

- Neural Sensors
- Themisto, Jupiter
- Cameria, Jupiter
- Naamah, Europa
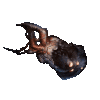
- Neurodes
- early:
- Mariana / Tikal, Earth
- Magnacidium / Terrorem, Deimos
- Zabala, Eris
- Yuvarium/Circulus, Lua
- early:
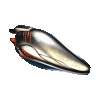
- Orokin Cell
- early: Magnacidium, Deimos // Deimos, everywhere
- Gabii / Draco, Ceres
- Helene, Saturn
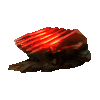
- Tellurium
- Ophelia, Uranus (Survival)
- Archwing / Railjack missions
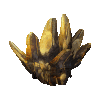
- Oxium (kill Oxium drones before they explode):
- Io / Elara, Jupiter
- Apollo, Lua
Research
2 sources of obtaining
- already built: prioritize Invasions
- otherwise craft via blueprints (expensive, single use) from Dojo + farm intermediate resources
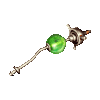
- Detonite Ampule
- Piscinas, Saturn
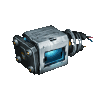
- Fieldron Sample
- Kelashin, Neptune

- Mutagen Sample
- Terrorem, Deimos
Open-World
Fishing, mining & conservation: sources of fish, ores & tokens. Do not forget your animal for double-drop. A tanky anti-CC frame (Rhino) or even invisible (Ivara, long duration) will make the experience more enjoyable.
Fishing
Fishing: details
- Gear:
- get fishing gear (spears, baits) from Hai-Luk (Cetus), The Business (Fortuna) and Daughter (Necralisk)
- equip your fishing spear in Arsenal, consumable wheel
- get Luminous Dye on Cetus to see fish well
- locations & fishing periods per fish: refer to wiki page on fishing
- in open-world of your choice:
Mining
Mining: details
- only 2 ore colors per open-world
- buy the mining tool directly from Fortuna (can be upgraded, superior to Cetus one)
- using the secondary fire with the mining tool allows zooming like with a sniper
- aim at the center of "rectangles" for better drops. The smaller/harder the rectangle, the better the reward.
Alternatives
Alternative fast / mid-game farm
- Fortuna:
- Itzal Archwing Farm: crates near buildings and in "bunkers"
- go into Deck 12 cave for mining: very few enemies and passing the "gate" in the cave allows resetting part of the cave infinitely
- Deimos:
- Itzal Archwing Farm: crates in the largest caves
- Activate Obelisks, wait for obelisk to debuff enemies and eliminate them with operator/necramech/Excalibur Umbra passive